Using SvelteKit to build a Community Ranking Ladder
To make products people use, one needs some frontend skills. Historically, frontend is a weakness of mine and I've been constrained to clunky CLIs and APIs to get what I want to do done. No longer! Last week I sat myself down and read the Svelte and SvelteKit documentation front to back. Since learning in software happens when you build something, I decided to build a leaderboard website for my latest obsession, Yomi Hustle.
The Leaderboard
You can find the Yomi Hustle leaderboard here.
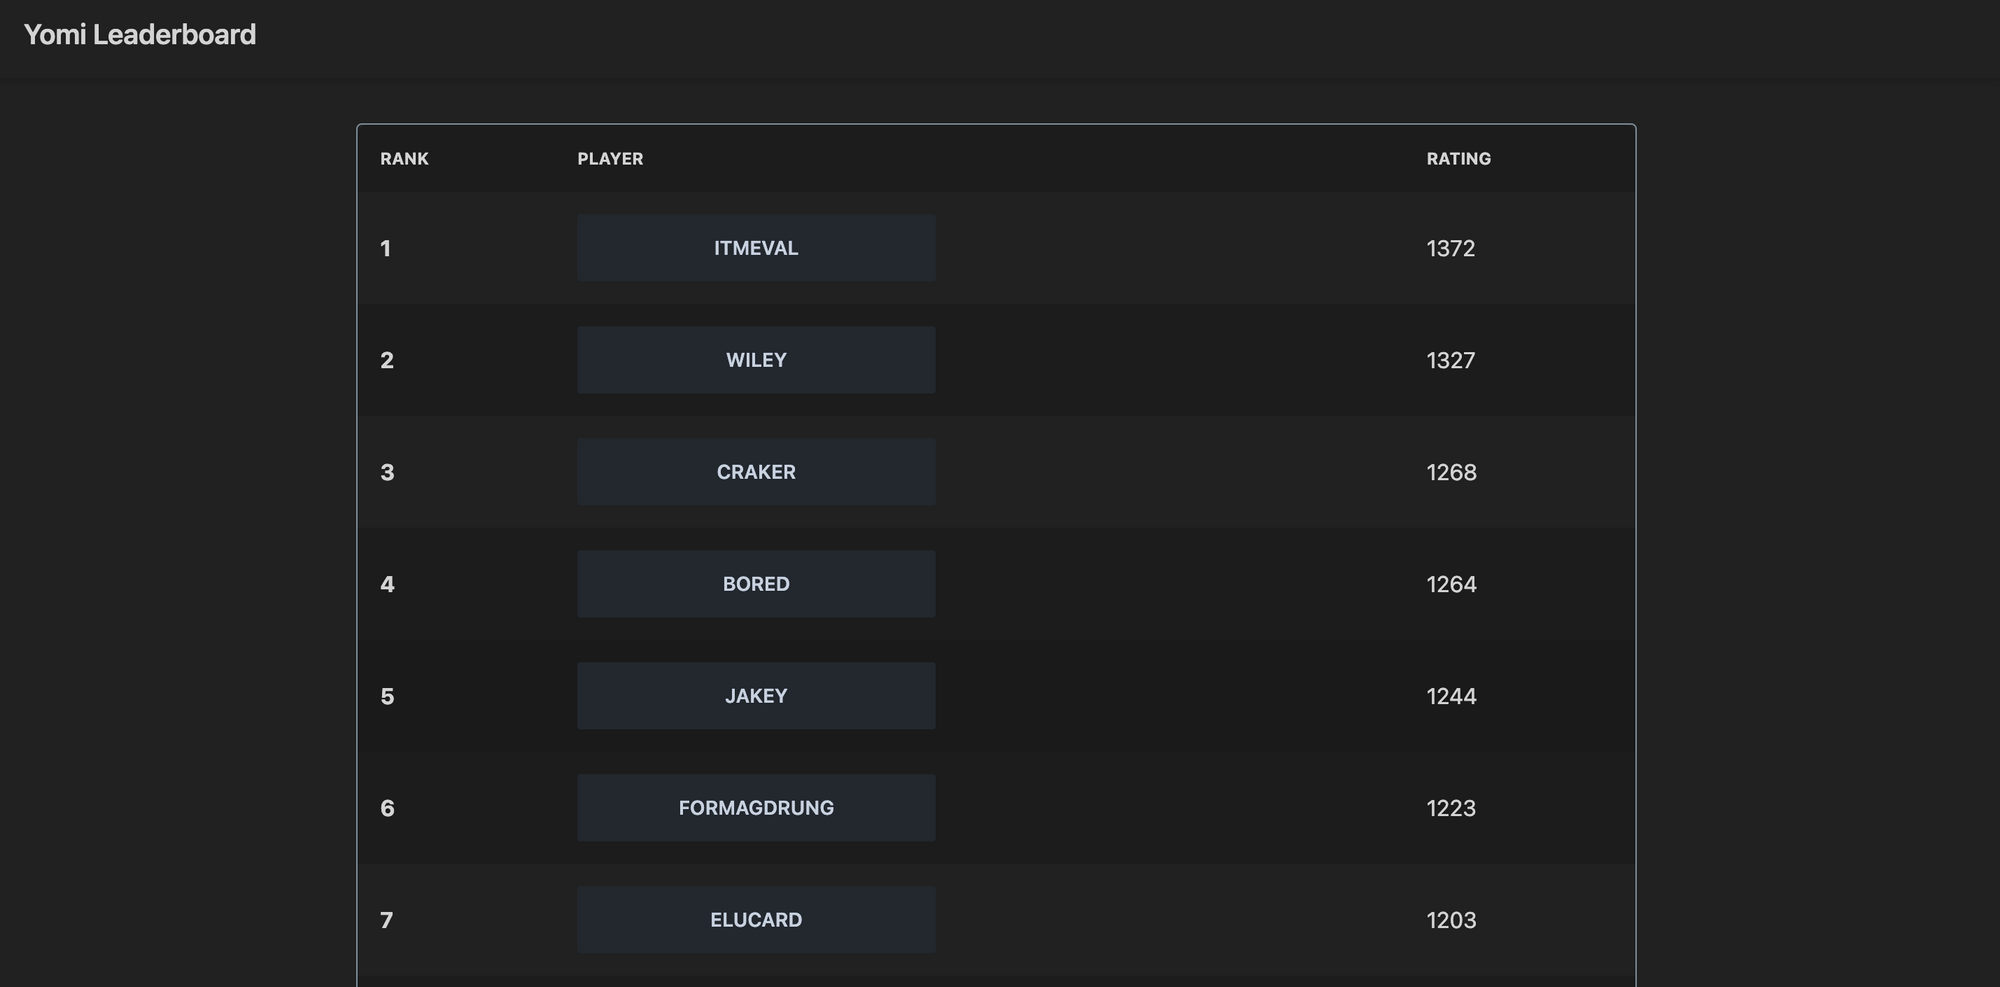
Simple and to the point, but this taught me a lot about making modern websites with a Javascript frontend framework like SvelteKit. Let's dive into what is required to make this page.
The Development Toolchain
My dependencies for this website include Svelte, SvelteKit, tailwindcss, and DaisyUI.
- Svelte is my UI Framework. I use Svelte to manipulate what is on the webpage at any given time.
- SvelteKit is my Application Framework. SvelteKit chooses what page should be shown to a user and uses Svelte itself for the rendering. Sveltekit provides functionality like routing to show different svelte pages for things like
/aboutand/users. - Tailwind CSS is a CSS framework that enables you dictate your styling on the HTML elements themselves, without needing to hand write CSS.
- DaisyUI is a UI component library that uses Tailwind to give you pre-styled HTML components for things like buttons, tables, navbars, etc.
Getting Started
To create the skeleton for my project, I followed the setup instructions provided by SvelteKit, TailwindCSS, and DaisyUI. If you want to mimic this setup with simple an npm i, feel free to clone my Github repo with this skeleton.
npm create svelte@latest yomi-rankings
cd yomi-rankings
npm i
npm install -D tailwindcss postcss autoprefixer svelte-preprocess
npm i tailwindcss/typographyWhen creating the SvelteKit app, I opted into using TypeScript.
import adapter from '@sveltejs/adapter-auto';
import preprocess from 'svelte-preprocess';

/** @type {import('@sveltejs/kit').Config} */
const config = {
	// Consult https://github.com/sveltejs/svelte-preprocess
	// for more information about preprocessors
	preprocess: preprocess({ postcss: true }),

	kit: {
		adapter: adapter()
	}
};

export default config;
/** @type {import('tailwindcss').Config} */
module.exports = {
  content: ['./src/**/*.{html,js,svelte,ts}'],
  theme: {
    extend: {},
  },
  plugins: [require("@tailwindcss/typography"), require('daisyui')],
}
Making the Leaderboard
Dynamically loading data is really easy in Svelte. Let's look at how I made the homepage photographed above.
<script lang="ts">
	import Leaderboard from '$lib/Leaderboard.svelte';
</script>

<div class="p-4 grid grid-cols-12 gap-2">
	<div class="col-span-12 lg:col-start-3 lg:col-span-8">
		<Leaderboard />
	</div>
</div>I'll skip over the boring parts of <Leaderboard /> and show the key bits.
	import { onMount } from 'svelte';
	import HustlerCard from './HustlerCard.svelte';
	import type { PlayerRating } from './types/types';

	export let hustlers: PlayerRating[] = [];
	onMount(async () => {
		fetch('/api/leaderboard')
			.then((res) => res.json())
			.then((data) => {
				hustlers = data;
			});
});{#each hustlers as hustler, i (i)}
<tr class="hover">
<th>{i + 1}</th>
<td>
<HustlerCard name={hustler.name} id={hustler.id} />
</td>
<td>{Math.round(hustler.rating)}</td>
</tr>
{/each}Now let's look at what this mysterious /api/leaderboard is.
import type { PlayerRating } from '$lib/types/types';
import { error } from '@sveltejs/kit';
import type { RequestHandler } from './$types';


export const GET: RequestHandler = async () => {
    const response = await fetch('http://yomitussle.tk/leaderboard', {
        method: 'GET',
        headers: {
            'Content-Type': 'application/json',
        }
    });
    let json: PlayerRating[] = await response.json();
    return new Response(JSON.stringify(json));
}These pieces together comprise what you see when you visit https://yomi-leaderboards-frontend.vercel.app/. You might have noticed that I am using Vercel for hosting.
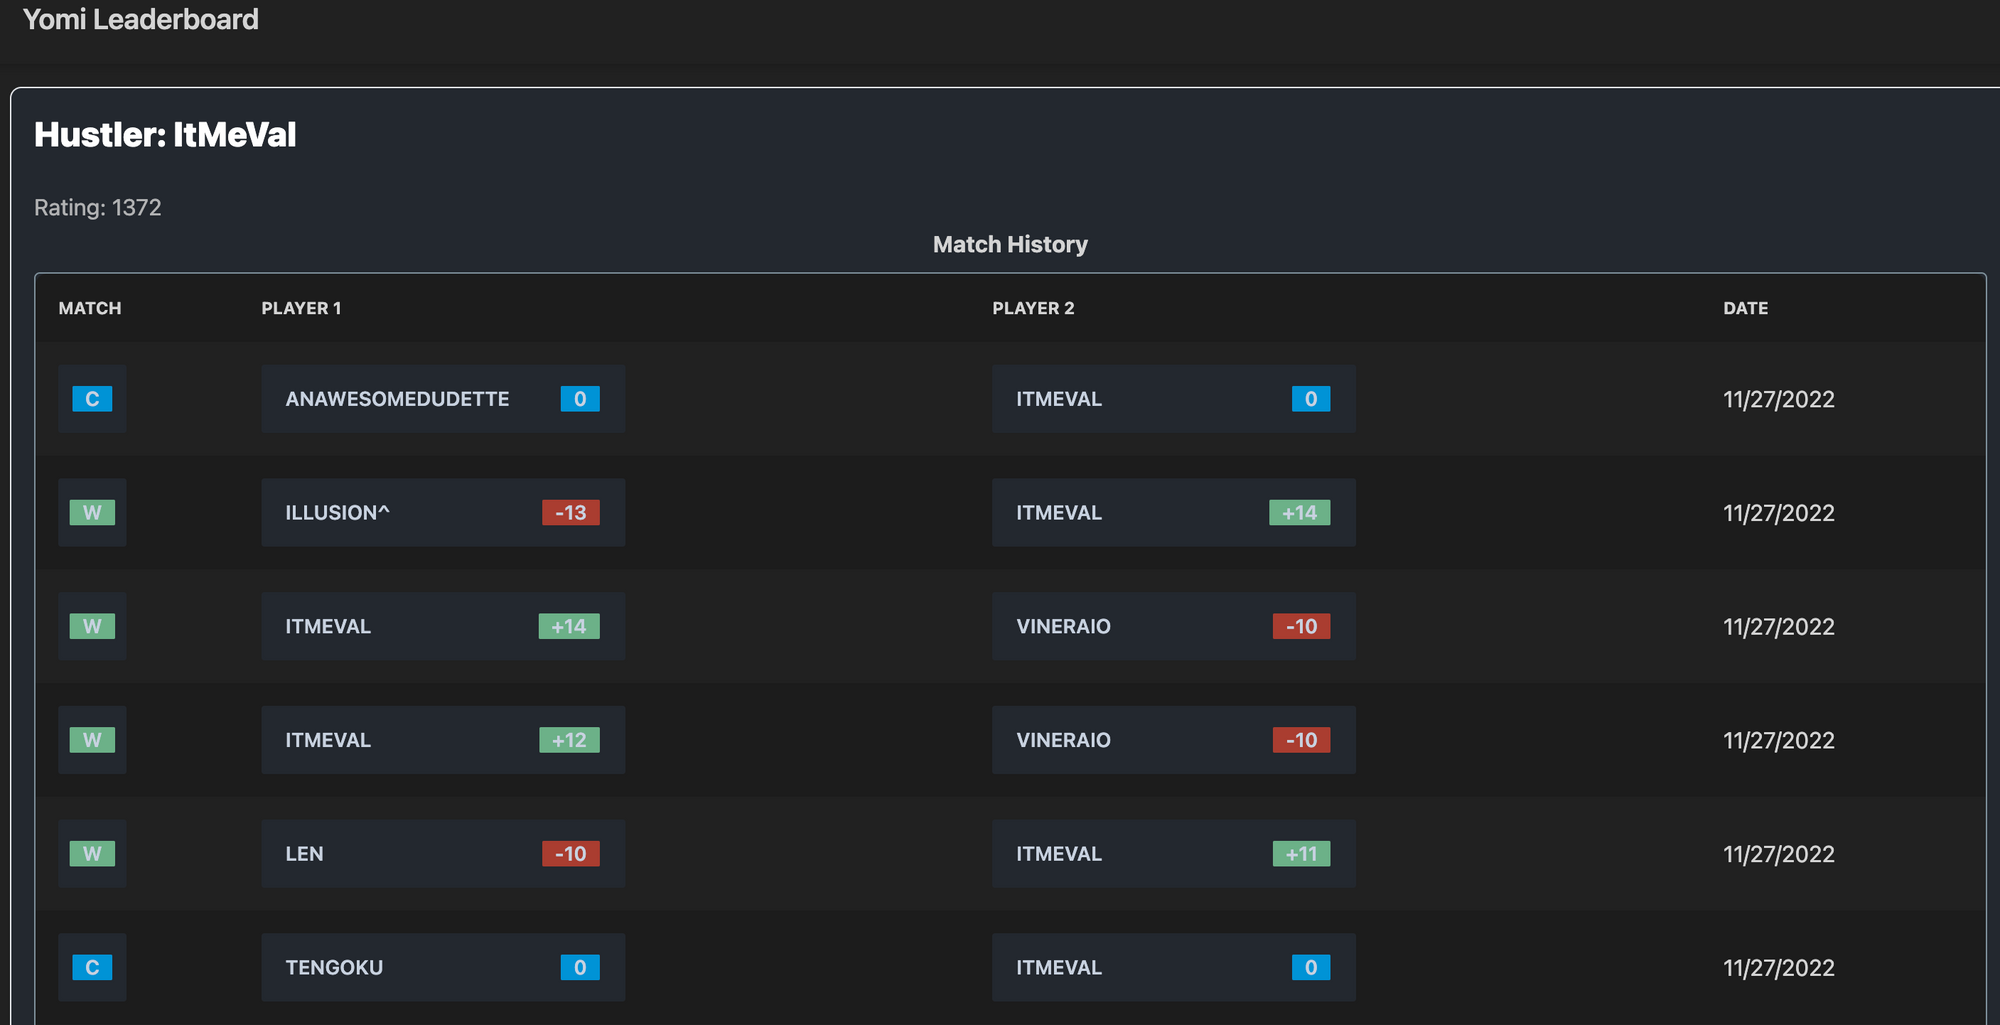
It really is that Easy! This writeup is not means to be a tutorial, but just an overview on how I created this dashboard over the course of a work-session one weekend. If you click on any user's name you can see their match history too!
If you have any questions about specific implementation details, reach out to me at contact [at] thornewolf.com. I am looking forward to hearing from you!